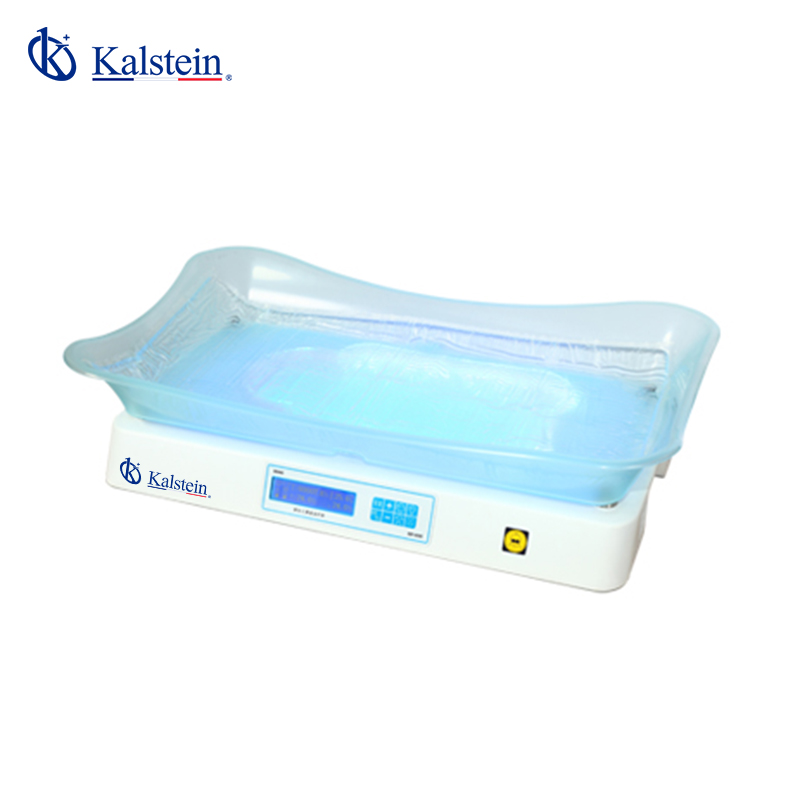
Installation and Commissioning Guide for the YR06222 Infant Phototherapy Unit
The YR06222 Infant Phototherapy Unit is a critical device used in the treatment of neonatal jaundice, utilizing advanced technologies to ensure effective therapy. This guide aims to provide a thorough understanding of the installation and commissioning process for the YR06222, ensuring that healthcare professionals can operate the unit safely and efficiently.
Overview of the YR06222 Infant Phototherapy Unit
The YR06222 model is designed to provide optimal phototherapy to infants suffering from high bilirubin levels. It features an LCD display that shows real-time information about the time, light intensity, and skin temperature, enabling caregivers to monitor conditions effectively. The internal fan helps maintain a stable temperature during use, while the programmable system controller allows for adjustments in light intensity based on specific needs.
Technical Specifications of the YR06222
| Specification | Detail |
|---|---|
| Model | YR06222 |
| Bilirubin Radiancy (4cm) | 3600μw/cm2 (60μw/cm2/nm) |
| Lighting Intensity | 33%, 67%, 100% |
| White Light | Yes |
| Radiant Space | 360 × 210 (mm × mm) |
| Power | ≤ 100VA |
| Wavelength | 400nm ~ 550nm |
| Radiant Uniformity | > 0.4 |
| Therapy Time Set | 0-99h59m |
| Temperature Monitor Range | 30 - 40°C |
Unboxing and Initial Setup
Upon receiving the YR06222, it is essential to conduct a thorough unboxing and initial setup to ensure the unit is ready for operation. Begin by checking the contents against the packing list to confirm that all components are included. The following checklist can assist in this process:
- YR06222 Unit
- Power Cable
- User Manual
- Calibration Tools
- Warranty Information
Anchoring and Leveling the Unit
Proper anchoring and leveling of the YR06222 unit are crucial for its efficient operation. The unit should be placed on a stable surface, ensuring it is level to avoid any operational discrepancies. Use a spirit level to check the alignment and adjust the feet of the unit if necessary. This step is vital in preventing any vibrations that may affect the performance.
Power-Up Sequence
To power up the YR06222, follow these steps:
- Connect the power cable to a suitable electrical outlet.
- Ensure that the main switch on the back of the unit is turned on.
- Press the power button located on the front panel.
- Allow the unit to initialize. The LCD display will show the startup screen.
During this phase, the system will perform self-checks to ensure all functions are operational.
First-Run Calibration
After the unit powers on, a first-run calibration is essential to verify that the readings are accurate. Follow these calibration steps:
- Access the calibration menu via the LCD display.
- Follow the prompts to adjust the temperature and light intensity settings.
- Use the calibration tools included in the package to verify accuracy.
- Save the settings before exiting the calibration menu.
This ensures that the YR06222 is ready for safe and effective use.
Common Setup Mistakes to Avoid
While installing the YR06222, be mindful of the following common mistakes that may impact performance:
- Not leveling the unit correctly, which can lead to inaccurate readings.
- Failing to secure the unit properly, causing potential hazards.
- Overlooking the calibration step, which is crucial for accurate therapy.
- Neglecting to monitor the room temperature and humidity, which can affect performance.
Frequently Asked Questions
What is the proper way to store the YR06222 when not in use?
The YR06222 should be kept in a dry, cool place away from direct sunlight and moisture. Ensure that the unit is powered off and disconnected from the power supply before storage.
How often should the YR06222 undergo maintenance?
Regular maintenance should be performed every six months, or as recommended by the manufacturer. This includes checking the calibration, cleaning the lamp, and inspecting electrical connections.
What types of light should be used with the YR06222?
The YR06222 is specifically designed for use with LED white light for effective phototherapy. Ensure that lights are replaced according to the manufacturer's guidelines.
How can I troubleshoot if the unit does not power on?
First, check the power connection and ensure the outlet is functional. If the unit still does not power on, there may be an internal issue that requires professional servicing.
Is there a warranty for the YR06222, and what does it cover?
Yes, the YR06222 comes with a standard warranty that typically covers parts and labor for a specified period. Refer to the warranty documentation for complete details.
How does the temperature monitoring feature work?
The YR06222 includes a built-in skin temperature sensor that continuously monitors the infant's skin temperature during therapy. This information is displayed on the LCD for real-time monitoring.
Where can I find replacement parts for the YR06222?
Replacement parts can be obtained through authorized distributors. It's recommended to order compatible accessories directly to ensure they meet the required specifications.
If you are looking for a fusion of innovation and quality, you have come to the right place. At Kalstein, we offer you the luxury of exploring our exclusive catalog of laboratory equipment. We manufacture every device to the highest standards of excellence. Our intuitive and seamless online purchasing channels are designed for your convenience, securing the most competitive prices. Hesitate no longer — we bring science to life, it is time to become part of our community.