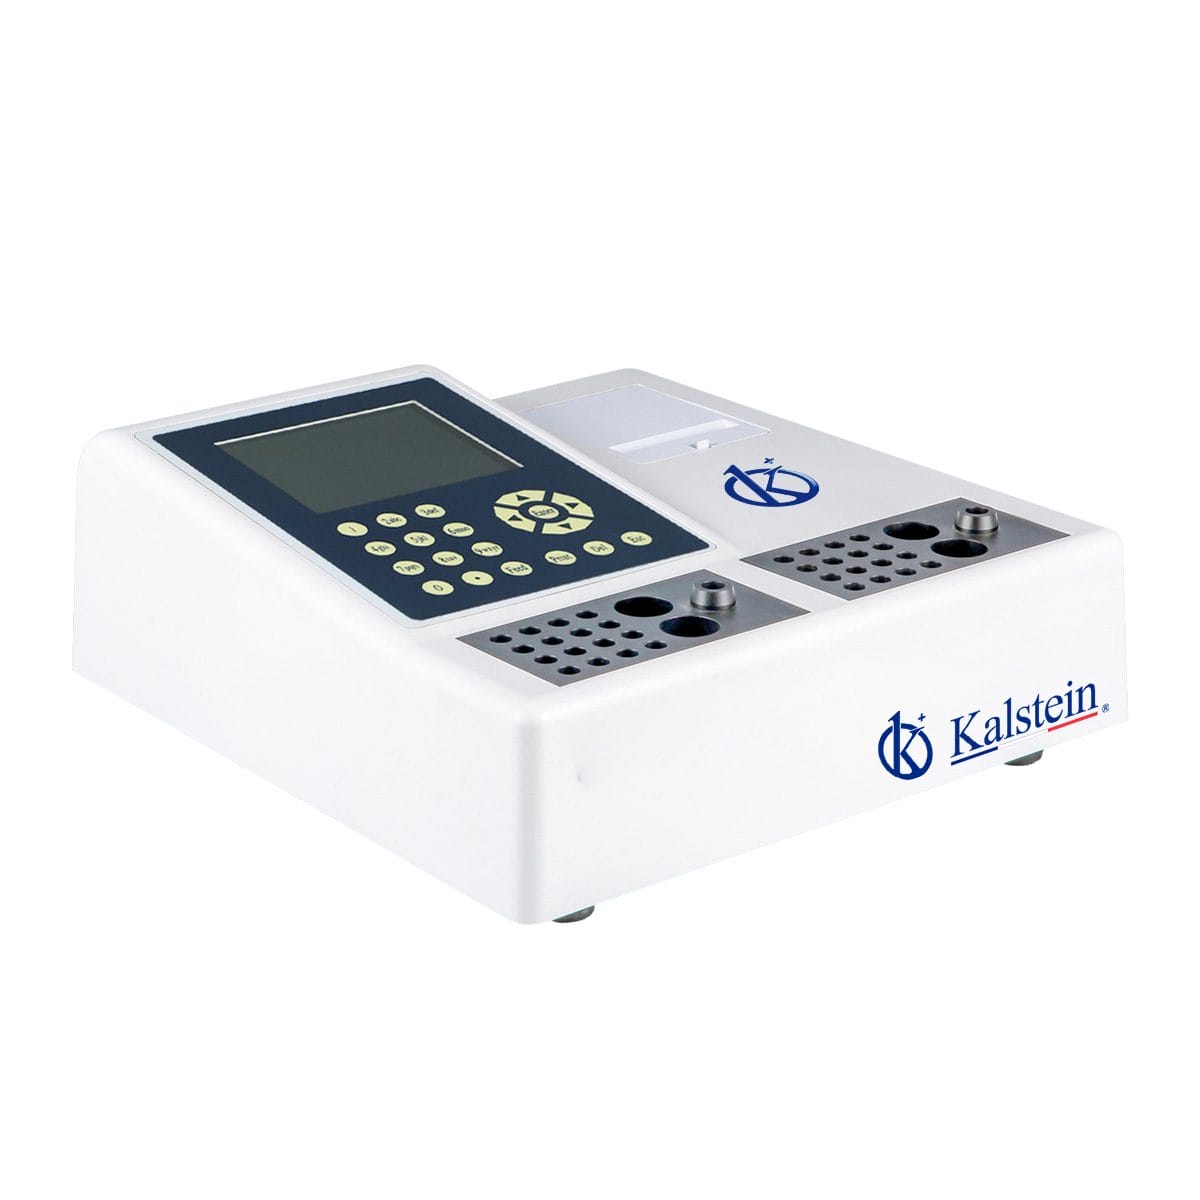
Installation and Setup Guide for the YR06173 Veterinary Coagulometer
The YR06173 Veterinary Coagulometer is a state-of-the-art device designed for precise coagulation measurements in various veterinary settings. This guide will walk you through the crucial steps for installation and initial setup, ensuring your coagulometer functions effectively from day one.
Understanding the YR06173 Coagulometer
The YR06173 model operates on photometric measurement principles, utilizing a halogen lamp as a light source for accurate readings. It features a dual channel system which allows for simultaneous testing of multiple samples, enhancing workflow efficiency in clinical laboratories.
Technical Specifications of the YR06173
| Specification | Details |
|---|---|
| Model | YR06173 |
| Built-in Incubator | 37°C ± 0.2°C |
| Sample Positions | 32 (2*16) |
| Reagent Positions | 4 (2*2) |
| Data Input | Membrane Keypad |
| Printer | Built-in thermal printer, 58mm wide paper |
| Operation Language | English, other languages available on request |
| Power Supply | 220V, 50Hz / 110V, 60Hz |
| Dimensions | 30cm x 40cm x 15cm |
| Weight | 5.5kg |
Unboxing and Initial Inspection
Upon receiving your YR06173, begin with an unboxing checklist:
- Verify that all items listed in the manual are included.
- Check for any visible damage during transit.
- Ensure that the power cables and accessories are intact.
Once verified, proceed to place the unit in a clean, stable environment suitable for operation.
Site Preparation Requirements
Before powering up the YR06173, ensure that the installation site meets the necessary requirements:
- Temperature: Maintain a stable room temperature ideally between 15°C to 30°C.
- Humidity: The operating humidity should be between 30% and 75% to prevent condensation.
- Power Supply: Ensure access to the specified voltage (220V or 110V) and frequency (50Hz or 60Hz).
- Space: Allow at least 60cm of clearance around the unit for ventilation.
Installation Steps
- Place the YR06173 on a flat, sturdy surface.
- Connect the power supply to the appropriate outlet.
- Ensure any additional accessories, such as the printer, are properly connected.
- Level the device using a spirit level to ensure accurate measurements.
Power-Up and Calibration
Follow these steps for powering on and calibrating your coagulometer:
- Press the power button to turn on the device.
- Follow the on-screen prompts to enter initial settings, including the date and time.
- Calibrate the device using the built-in calibration function, ensuring accuracy in measurements.
- Run a sample test to verify operational status and accuracy.
Common Setup Mistakes
As you set up the YR06173, avoid these common mistakes:
- Powering up the device before leveling it correctly.
- Ignoring environmental conditions which can affect performance.
- Connecting the device to an incompatible power supply.
Troubleshooting Initial Setup Issues
If you encounter issues during setup, consult the following troubleshooting guide:
| Symptom | Probable Cause | Solution |
|---|---|---|
| Device does not power on | Power supply issue | Check connections and try a different outlet |
| Error code E-03 | Calibration failure | Re-calibrate according to the manual |
| Inconsistent readings | Improper sample preparation | Ensure samples are prepared according to protocols |
Frequently Asked Questions
What environmental conditions are optimal for operating the YR06173?
The optimal environmental conditions for the YR06173 include a temperature range of 15°C to 30°C and humidity between 30% and 75%. This helps ensure accurate measurements and device longevity.
How do I calibrate the YR06173 for the first time?
To calibrate the YR06173 for the first time, power on the device and follow the prompts on the screen to enter initial calibration settings. It is crucial to use control samples that are known for accurate calibration.
What should I do if the device displays an error code?
If an error code appears, refer to the user manual for specific troubleshooting steps related to that code. Common solutions include re-calibrating or checking sample integrity.
How can I ensure consistent sample readings with the YR06173?
To ensure consistent readings, follow proper sample preparation protocols, maintain regular calibration of the device, and ensure that the environmental conditions remain stable.
What maintenance is required for the YR06173?
Regular maintenance includes cleaning the device, checking for wear on components, and ensuring that the printer has sufficient paper and ink. Scheduled checks should be performed according to the user manual recommendations.
Can I use third-party reagents with the YR06173?
While third-party reagents may be used, it's advisable to use those specifically recommended for the YR06173 to ensure the accuracy and reliability of results.
Conclusion
If you are looking for a fusion of innovation and quality, you have come to the right place. At Kalstein, we offer you the luxury of exploring our exclusive catalog of laboratory equipment. We manufacture every device to the highest standards of excellence. Our intuitive and seamless online purchasing channels are designed for your convenience, securing the most competitive prices. Hesitate no longer — we bring science to life, it is time to become part of our community.